Friday, June 29, 2012

Friends with barbecues


Ohhh barbecue season, I love you. I really, really do. I love your taste, your smell, your assumption that we will eat outside. I even love chasing after flying napkins, licking mustard off my hand, and awkwardly eating on the grass/curb/wobbly chair.

My apartment building doesn't allow barbecues (I know, super lame) so I am trying to lure my barbecue-owning friends into inviting me over for some fun and tasty times this summer. I promise I will bring some delicious eats to throw on the grill. This week I brought drunken tofu (see picture above), marinated for 20 hours in beer, garlic, ginger, and barbecue sauce. It was delicious. Get the recipe here.

Here's hoping we all get to enjoy a little barbecue on this fine Canada Day weekend!
Rebecca

Tuesday, June 26, 2012

Refried Black Beans


As you've probably guessed (or perhaps you know because I've written it one thousand times on this blog), I'm a big fan of beans. They are my number one protein preference and I'm on a mission to show the world just how versatile they really are.

Refried beans  are delicious, but when you buy them in a can they are generally packed with sodium, fat, and extra calories. I decided to make my own and it really wasn't that hard. I added them to a whole grain tortilla, topped with salsa verde, a squeeze of lime, and some avocado. They would also be delicious in a breakfast burrito or piled on top of nachos. 


Recipe: Refried black beans

Black Beans, cooked - 2 cups 
Onion, chopped - 1/4 cup 
Garlic, minced - 2 cloves 
Cumin - 1/2 tsp 
Serrano pepper, roasted and chopped - 1 
Olive oil - 1/2 tbsp 
Water - 2-4 cups 

Directions: 
Add olive oil to a hot pan and fry onion and serrano pepper (you can also use jalapeno). Add garlic and cumin stir together and add beans to the pan (about 1/2 cup at a time).
Smash/smoosh/squash the beans with your spoon or potato masher, adding a little bit of water to moisten the consistency*. Continue to add the beans, smashing along the way. I added about 1/4 cup of water at a time until I came up with my desired consistency. This will be different for everyone, so stop when you feel you have reached the right level of moisture and smoothness. If you've added too much, fear not, just cook for a little while longer and the water will (hopefully) evaporate. Go ahead and let the beans start to get crispy and crunchy before stirring them.
*You can also blend your beans in a food processor and then fry on a pan. I decided to kick it old school and do it with a spoon and potato masher.....cutting down on dish washing time played a key role in this decision.

Wishing you tasty meals and happy days,
Rebecca

Saturday, June 2, 2012

Summer Bouquet

picture taken from pinterest.com

Adding berries to a summer bouquet, in my opinion, is simply charming. 

Happy weekend, 
Rebecca


Wednesday, May 30, 2012

Salsa Verde


Do you recognize the fruit in the picture above? They're tomatillos and they are beautiful. I have a billion pictures of them 'cause they are just so darn pretty.


This is the first time I've cooked with tomatillos - so here's a one-sentence-fast-fact on them: tomatillos look similar to green tomatoes, are related to the cape gooseberry, and provide the tart flavour in Mexican green sauces.

I've been meaning to make Salsa Verde forever, so I'm happy to say that I finally got my booty in gear and picked up some tomatillos at the grocery store. Tip: despite their similar look to tomatoes I found them in the exotic fruit section rather than the tomato section.


"What will I do with Salsa Verde?" you ask. The answer is simple: anything you want.  Dip with rice crackers or tortilla chips, add to a burrito, enchilada, or taco, use as a burger topping, pour over rice, or serve with scrambled eggs and/or refried beans. Any other ideas? 

This guilt-free dish is packed with nothing but vitamins and minerals. It's low in calories, and when you make it yourself, contains very little sodium (you can even leave out the salt completely!).


Recipe: Salsa Verde 

Ingredients:
Tomatillos - 1 pound (this was about 7 tomatillos)
Serrano (or jalapeño) pepper - 1
Garlic, clove - 2
Cilantro, fresh - 1/2 cup
Onion, diced - 1/4 cup
Lime juice - 2 tsp (10 mL)
Salt - pinch (optional)

Directions: 
1. Preheat oven broiler.
2. Remove papery husk from tomatillos, wash, and cut in half.
3. Place tomatillo halves, Serrano pepper, and garlic cloves (unpeeled) on a baking sheet (option: line baking sheet with parchment paper for easy clean up). 
4. Broil for 15-20 minutes, until tomatillos and peppers are roasted and slightly charred on both sides. Turn over half way through.
5. Once cooled, remove the skin of the Serrano pepper and garlic.
6.  Throw all ingredients into a food processor and pulse until well blended. Salsa verde tends to thicken as it cools, so blend more for a thinner consistency.

Prepare....

Roast....


Blend, blend, blend.....


Eat and enjoy! 

Wishing you tasty meals and happy days,
Rebecca

Monday, May 21, 2012

Sea what you've been missing


Recipe Reduxers have been given the Sea What You've Been Missing challenge this month in hopes of expanding our culinary skills to include nutritious treasures from the sea. With that in mind I got my sea vegetable hat on and decided to skip the japanese restaurant and make homemade sushi.


Sushi is one of my favourite foods however I almost always fill my sushi cravings at Japanese restaurants since it takes a bit of time and patience to make at home (but hey, all good things in life take time and patience, right?). After making these vegetable sushi rolls I have decided that a make-your-own-sushi party is in my near future (regardless of the rice-smooshed-onto-floor mess that I will inevitably face at the end of the night).

The great thing about sushi is that you can add whatever fillings suit your fancy, your budget, and your refrigerator contents.  I used sautéed and roasted veggies but you can also try smoked salmon, raw sushi-grade fish, shrimp, or mango!

Recipe: Asparagus Portabella Sushi Roll


First, decide what you want to fill your sushi with. I chose oven roasted garlic asparagus, sautéed portabella mushrooms, sautéed tofu, cucumbers, and avocado. These can be hot or cold (I prefer cold). 


Next, cook your rice. Make sure you use sushi rice since it has a sticky texture that keeps everything in place. Add uncooked rice to water and bring to a boil (see package instructions for ratio of rice:water). Reduce heat and cover for 15 minutes (do not uncover during this time). Remove rice from heat and let sit, covered, for ten minutes. Meanwhile, mix 1/4 cup rice vinegar, 4 teaspoons of sugar, and 3/4 teaspoon of salt. Pour  mixture over rice in small batches and fold rice until covered. Spread rice on a baking pan and let cool. 

And of course, the feature of this post - Nori! Nori is a thin, dried, seaweed sheet. One sheet of nori contains 1 gram of fibre, 6% Daily Value of Vitamin A, 4% of Vitamin C, and 3%  of Vitamin D. 


Place plastic wrap on top of the bamboo mat and place the nori on top of the plastic wrap. Place the shiny side of the nori down with the dull side facing up.  


Spread a layer of rice over the dull side of the nori.  If the rice is sticking to your hands just run them under cold water. 


Place sushi filling across the middle of the nori. Don't overstuff  - unless, of course, you have a really big mouth :) 


Roll the nori with just the plastic and then finish it off by wrapping the bamboo mat around the roll. To better see how this works check out this instructional video.


With a sharp knife cut the roll into slices. Serve with wasabi, pickled ginger, and soy sauce. 
When possible, choose low sodium soy sauce, or limit the amount you use. Soy sauce has a high amount of sodium which in excess can increase your risk of high blood pressure, dehydrate you, and in my case, cause a serious case of swollen eye lids! 


Check out the recipe redux entries below to find some more recipes that feature small fish (like sardines, anchovies, and smelt) and sea vegetables (like seaweed and kelp). 

Wishing you tasty meals and happy days, 
Rebecca


Sunday, May 13, 2012

M-M-M-Mochi

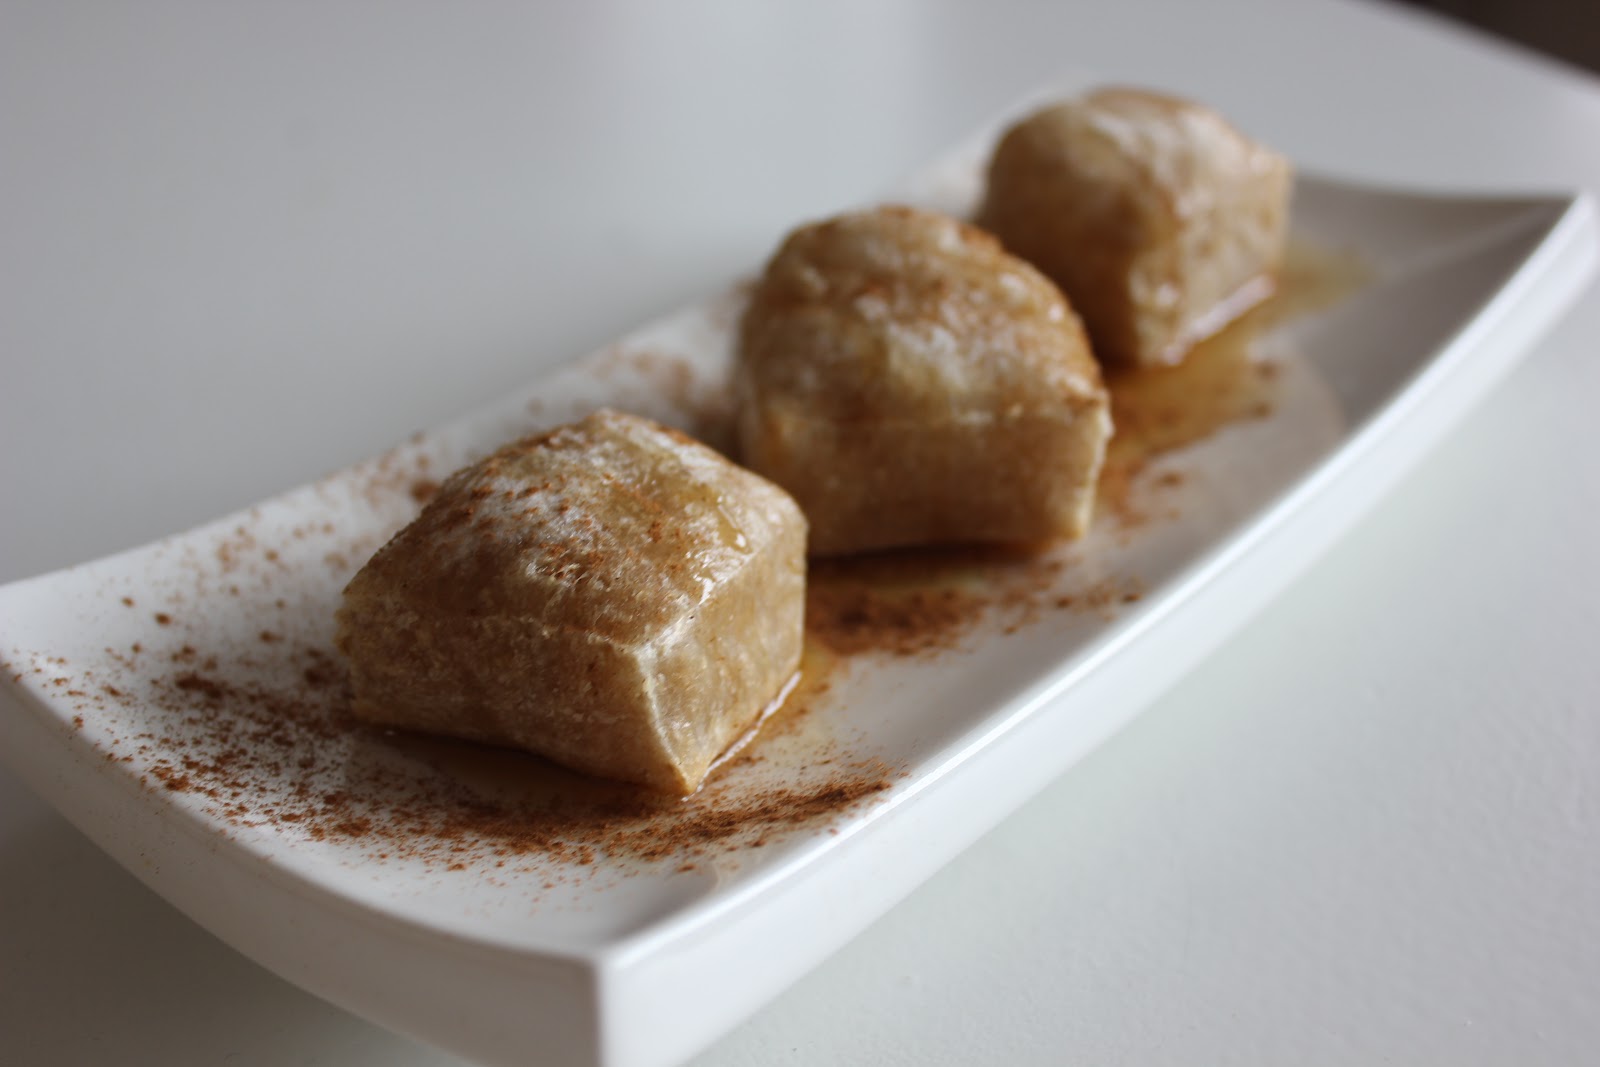
Do you like trying new foods? I sure do.  So last weekend while at The Big Carrot with a friend we stumbled across Mochi. Not knowing what it was, we read the package - 'the rice cake u bake", Ingredients: brown rice and water.  Hmm...cake with two ingredients - clearly we had to see what it was all about. 

According to Wikipedia,  Mochi is a traditional food for the Japanese New Year, made out of glutinous rice pounded into a paste and moulded into shape.


It's simple, you unwrap the package and break it into squares or chunks. You then broil it in the oven for 5 to 10 minutes and ....


Voila! Cute, puffed up squares.


These look really yummy don't they? Well, hold your horses. Mochi is certainly interesting, but it has a really bizarre texture. The outside is crispy while the inside is super chewy and doughy. There is no sugar or seasoning in it so it's quite bland and absolutely needs something to accompany it. My solution was to drizzle with maple syrup and cinnamon, which did the trick, but you can also go savoury.


Did I enjoy the mochi? Yep.
Am I glad I didn't serve it at a dinner party? Yep.
Will I buy it again? Probably not.
Do I think it can be transformed into a tasty healthy snack? Oh yes. I'd love to hear about your mochi success stories!


Wishing you mochi success, 
Rebecca 

Friday, May 4, 2012

See the beauty


Beautiful moments this week include:

Sunshine
Bike rides
Far away friends sending texts that make me smile big
Thunder storms and warm rain 
Funny workmates 
Documentaries that make your heart smile  
Week night adventures 
Hanging out with high school kids for a day
Hugs
A nature escape in a bustling city 
Silly people
Endless options


Wishing you a weekend full of beautiful moments, 
Rebecca